Configuring the Transfer Mode
The transfer mode controls how local devices synchronize changes with other devices. It can be set differently on each device regardless of whether they share the same folder or not. Combining the right transfer modes is the key to making the client work to your liking.
When the Expert Mode is enabled, you can choose the transfer mode when setting up a new folder or when joining an existing folder. It can later be changed via the settings tab of a folder.
Useful combinations include:
- Auto Sync on all devices in order to sync all changes between multiple devices.
- Share/Send and Auto Download in order to send files from one device to another.
- Backup Source and Backup Target in order to back up data from one device to another.
![]()
Configuring Transfer Modes requires the Expert Mode to be enabled!
1. Configuring a preset Transfer Mode:
In order to set the transfer mode to one of the preset options:
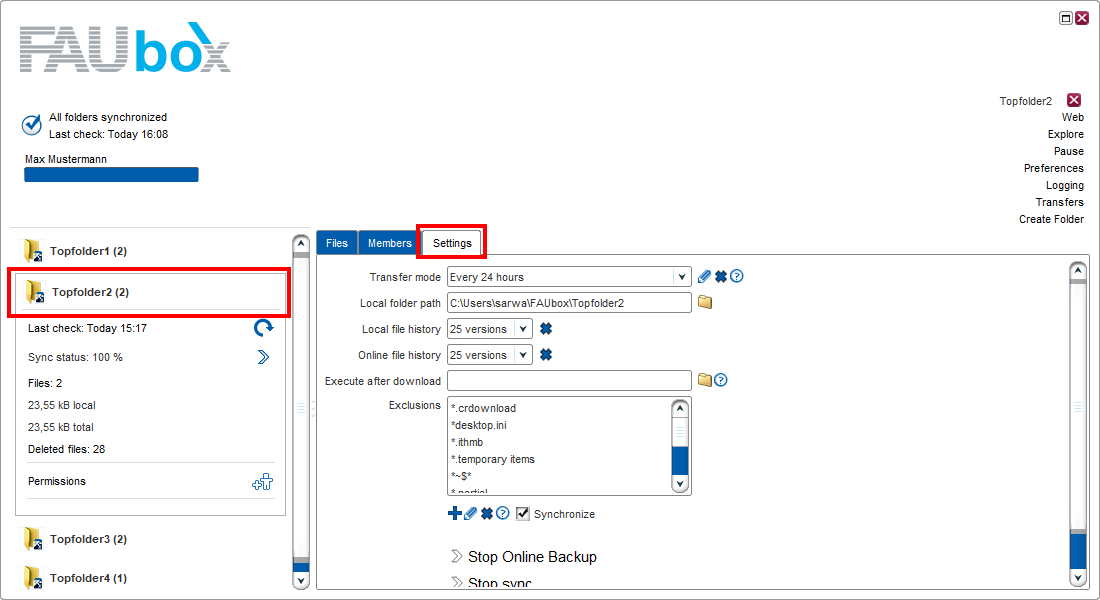
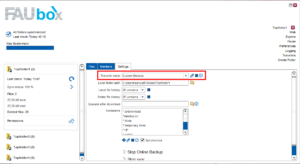
- Click on the top-level folder you want to configure the transfer mode.
- Open the tab Settings.
- Open the drop-down menu next to Transfer mode.
- Select the preferred transfer mode.
The table below offers a summary of all offered options and their respective properties.
- Done! The transfer mode has been successfully set to the selected mode.


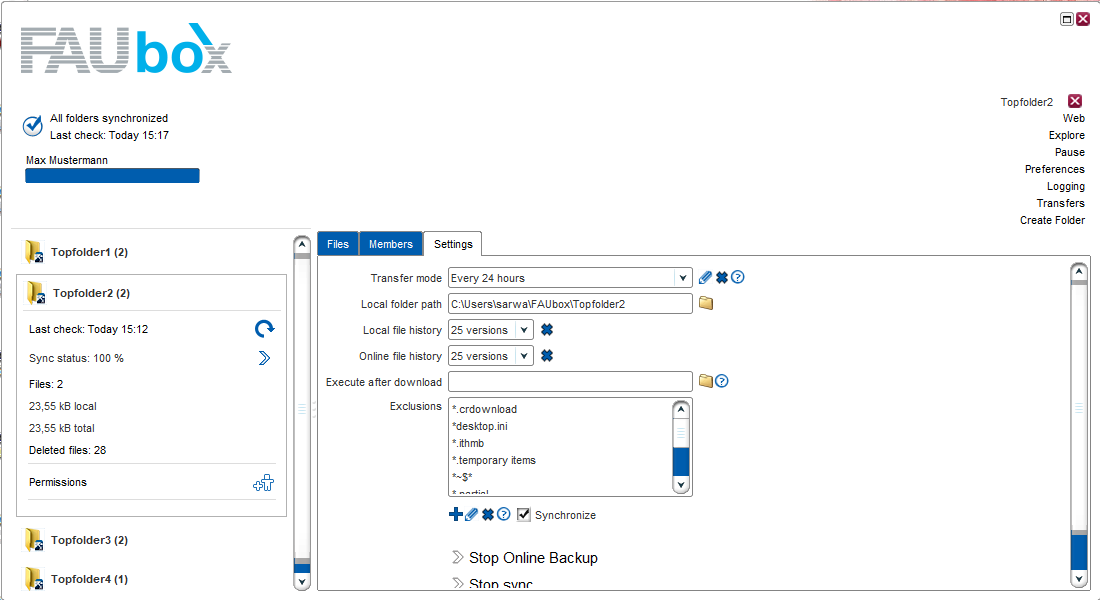
Comparison of preset Transfer Modes
| Name of the transfer mode | Change detection | Download | Upload | Note | |
| Auto Sync |
|
|
|
Recommended for mirroring folders on two or more devices.
|
|
| Manual Sync |
|
|
|
||
| Backup Source |
|
|
|
Recommended for backing up folders.
Remote clients should use the Backup Target transfer mode. |
|
| Backup Target |
|
|
|
Recommended for backing up folders from remote devices.
Remote clients should use the Backup Source transfer mode. |
|
| Auto-Download |
|
|
|
||
| Share/Send |
|
|
|
Recommended for selecting files to download from the internal file browser on demand. | |
| Every 24 hours |
|
|
|
||
| Auto Sync (5 minutes) |
|
|
|
Recommended for mirroring folders on two or more devices. |
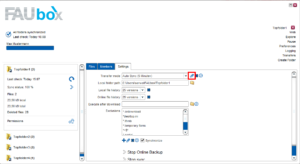
2. Creating a custom Transfer Mode:
To create a custom transfer mode:
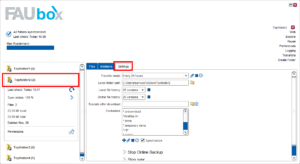
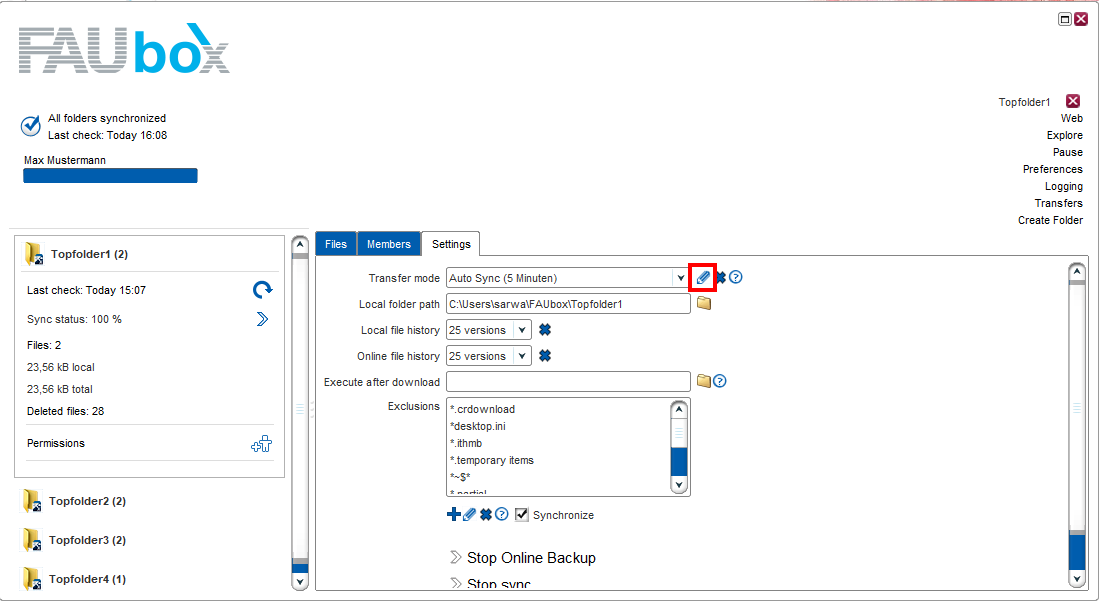
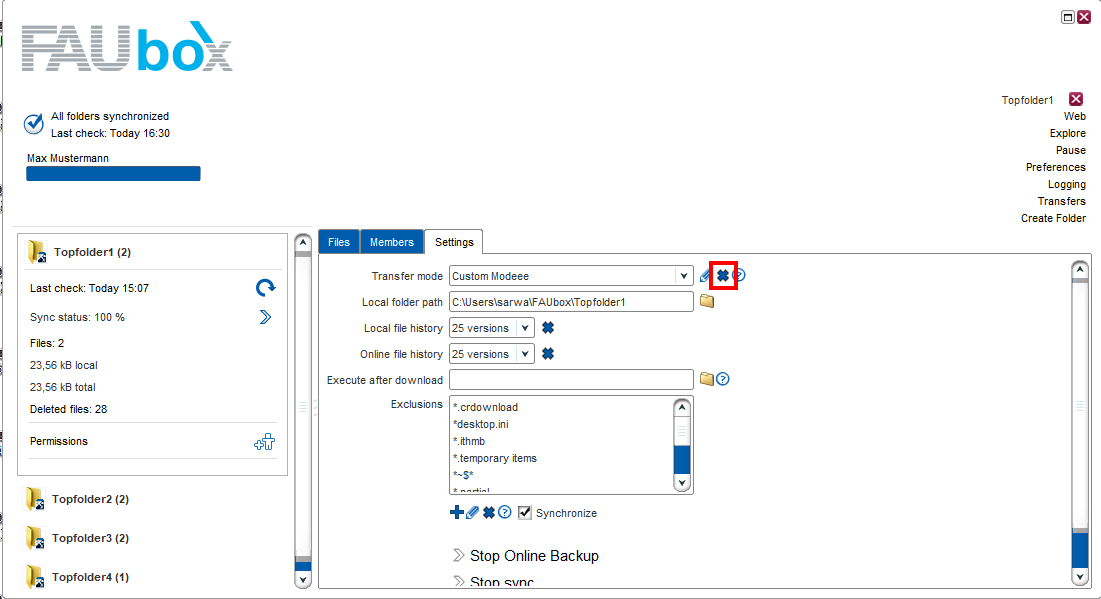
- Click on the folder for which you want to create a custom transfer mode.
- Open the Settings.
- Click on the edit icon next to the transfer mode selection drop-down menu.

Next, you may receive the following notification informing you that other top-level folders will also be affected by this change. If you don’t mind or actually prefer that the custom transfer mode will also be applied to the other top-level folders, click on OK.
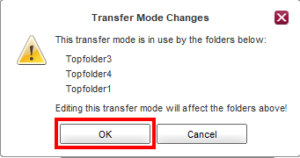
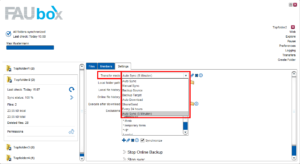
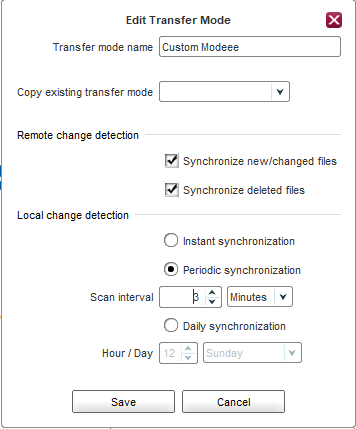
Otherwise, you have to change the transfer mode from Auto Sync (5 Minutes) to another preset one (by selecting one from the drop-down menu) first. Afterward, you can proceed as described in step 3 and click on the edit icon. - Afterward, the transfer mode editor will open up. Enter a new name for the transfer mode and customize it to your needs.
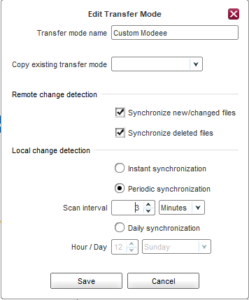
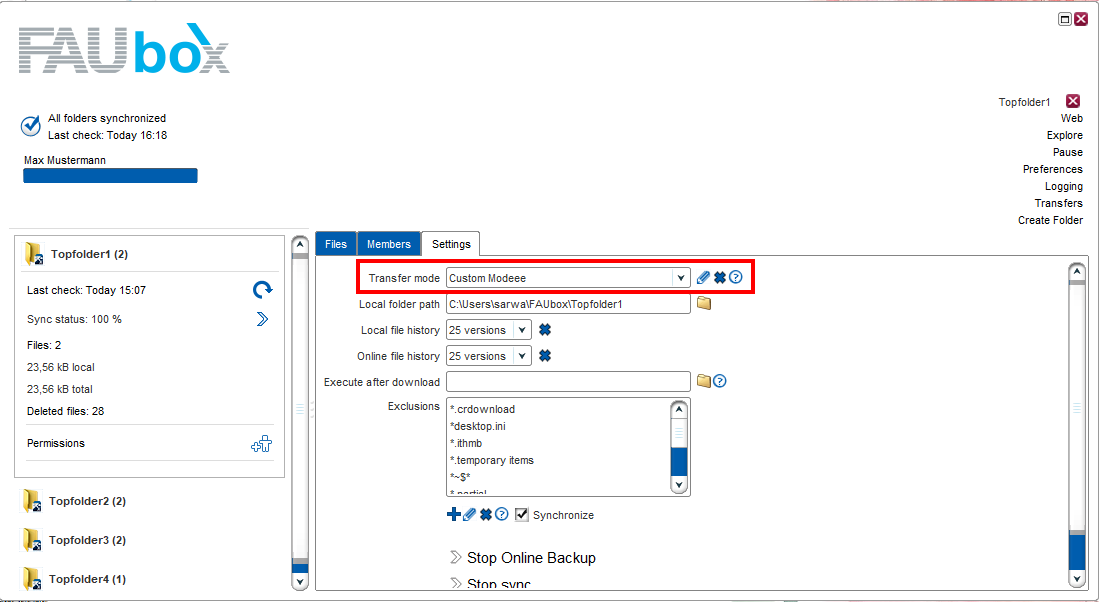
- Click on Save next.
- Done! The client will immediately apply the custom transfer mode to all affected top-level folders.

3. Resetting a custom Transfer Mode:
- Click on the top-level folder that you want to reset the transfer mode.
- Open the tab Settings.
- Click on the x-sign next to the transfer mode drop-down menu.
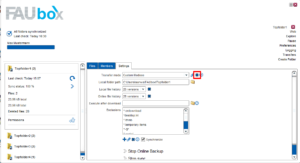
- Next, the following window will open up. Select a substitute transfer mode from the drop-down menu.
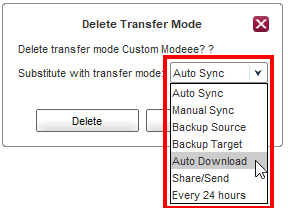
- Click on Delete.
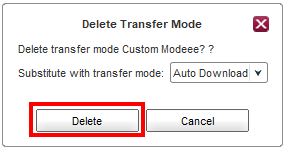
- Done! The settings for the transfer mode have been successfully reset to the selected preset transfer mode.
![]()
If you want to set the transfer mode to a custom mode once again, you can only do that after you have reset the transfer mode to a preset mode first. To configure the settings to a custom transfer mode follow the instructions listed in the second section.
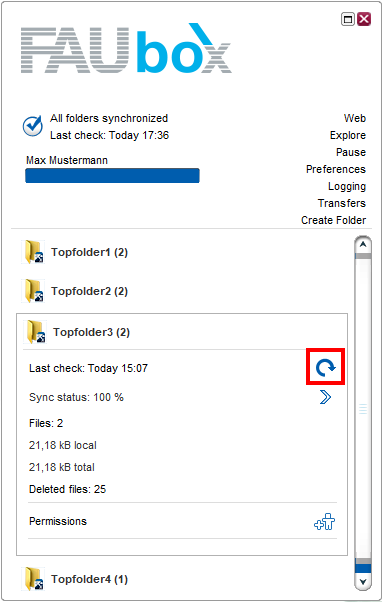
4. To manually start the Synchronization:
The FAUbox scans local folders for changes when starting the client as well as after a specific time interval (5 minutes if the default transfer mode is not changed) while the program is running. But the scan/synchronization on local and remote devices can also be forced by pressing the sync button in the folder information tab.