File Archive Configuration
Whenever the client updates or deletes a file, it moves the previous/deleted version of that file into an internal file archive. This file archive can hold a configurable amount of versions and is decentralized, meaning that each device holds a set of archived files which can be restored manually on demand.
1. Configuring the archive-settings of folders individually
1.1 To configure the number of versions saved in the local file archive of a toplevel folder
1. Click on the toplevel folder you want to configure the file archive of.
2. Open the tab Settings in the panel that will open up on the right.
3. Select from the Local file history drop-down menu how many versions should be stored locally.
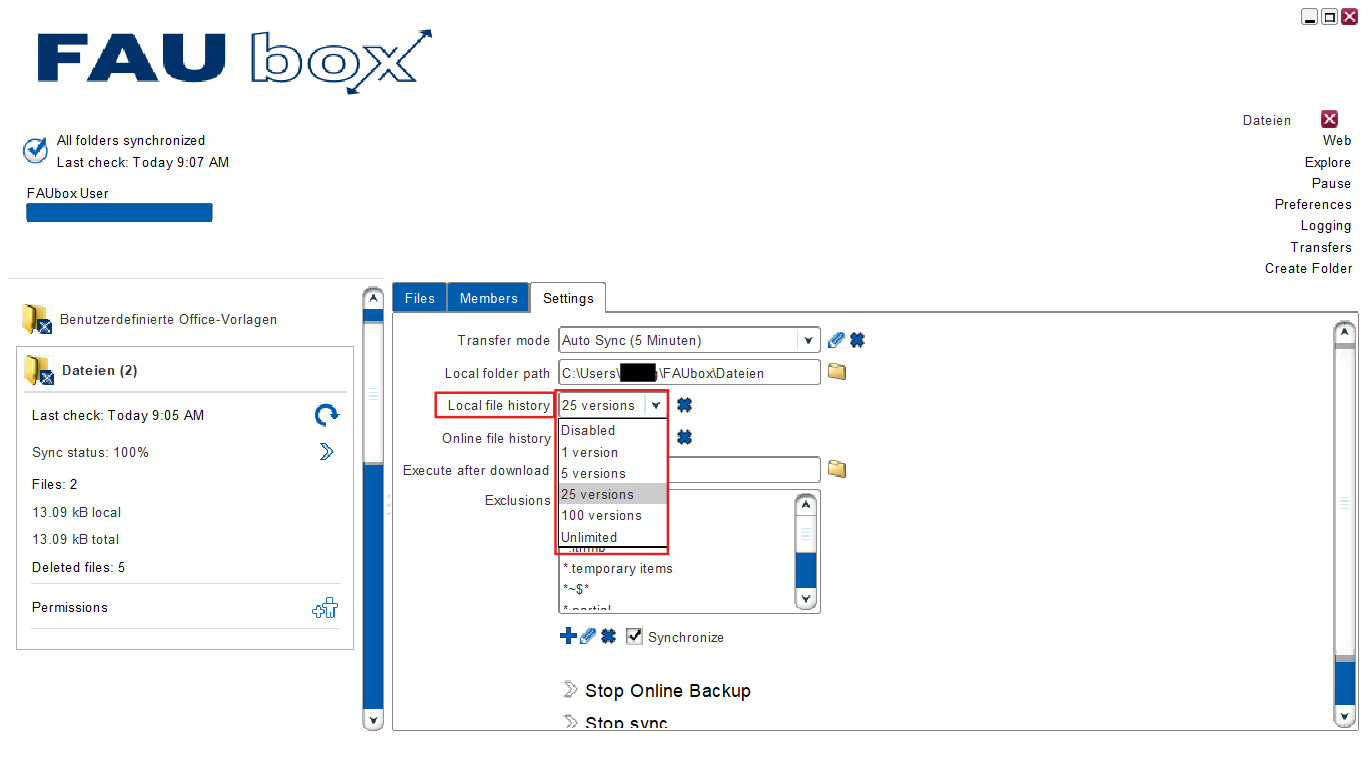

As can be seen in the picture above, the client offers multiple options for the archive-configurations.
- Disabled
- 1 version
- 5 versions
- 25 versions (Default)
- 100 versions
- Unlimited
Once you have selected one of the above listed options, the quantity of the saved versions in the file archive will be adjusted to this set number. E.g. if you have chosen the option 5 versions, then the client will henceforth save 5 older/deleted versions of each file (that is located in the toplevel folder). As soon as this number is reached or exceeded the oldest file version will be replaced by a newer one.
In case you do not want any older/deleted file version to be saved in the file archive, you have to select the option Disabled. Remember: By choosing this option, no older/deleted file version can be restored via client.
4. Done! From now on only the set amount of file versions will be kept in the file archive.
1.2 Purging the file archive content of a toplevel folder
1. Click on the toplevel folder you want to purge the file archive of.
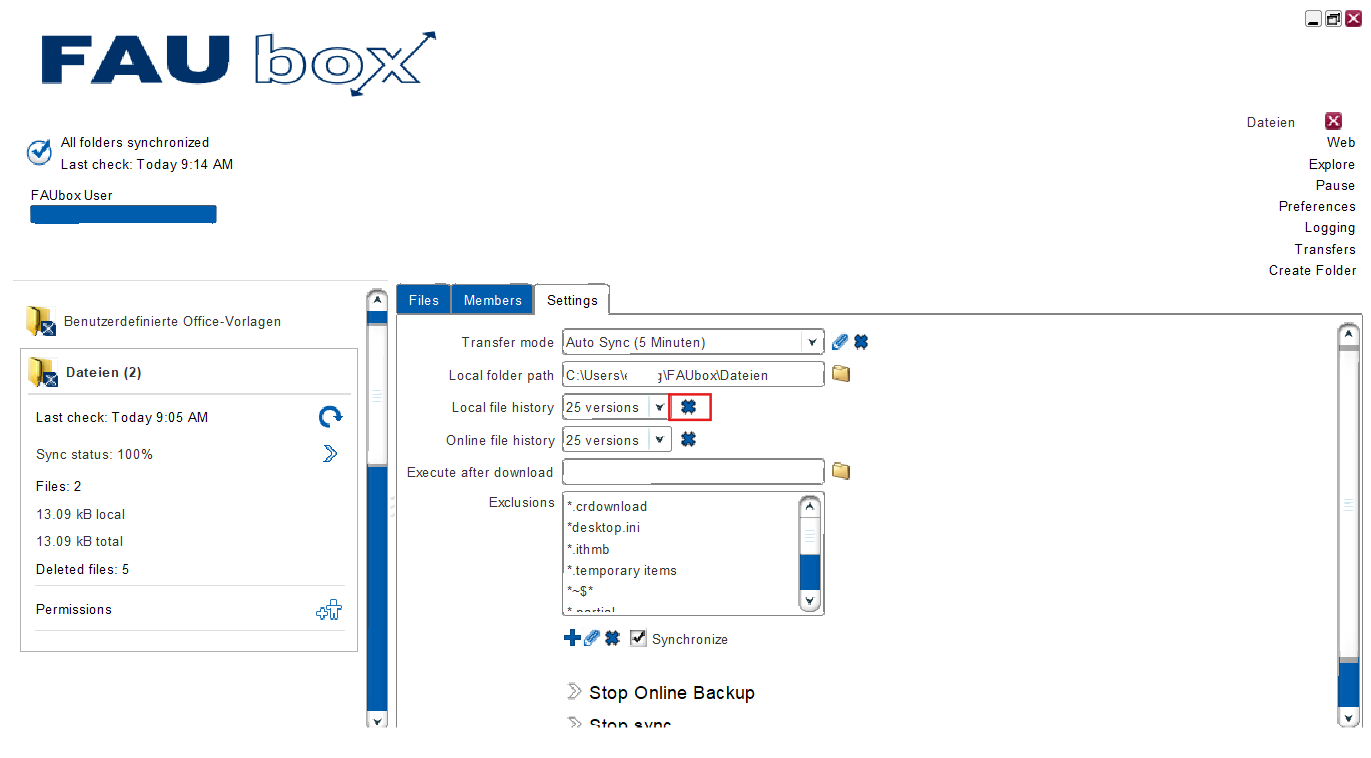
2. Open the tab Settings in the panel that will open up on the right.
3. Click on the x-sign next to the Local file history drop-down menu.
4. Confirm your choice by clicking on Purge.
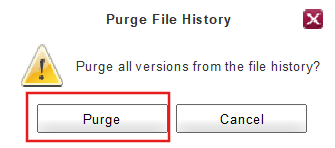
5. Done! The file archive is now purged and all saved versions are deleted.
2. Configuring the archive-settings for all folders at once
2.1 To configure the number of versions saved in the local file archive of all toplevel folders
The client offers the option to configure the file archive of all toplevel folders at once:
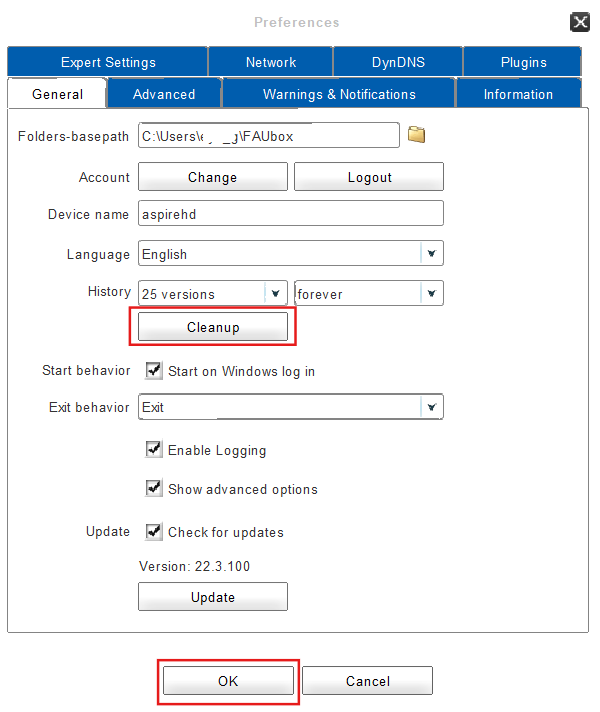
1. Click on Preferences on the main window.
2. Open the tab General.
3. Select from the drop-down menu next to History how many versions should be stored for what amount of time in the file archive.
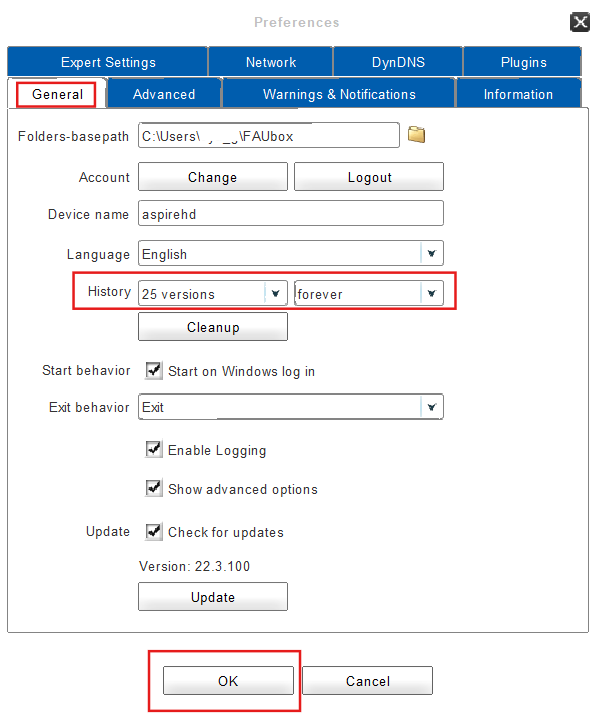
Apart from the possibility to configure the quantity of versions that should be saved in the file archive, the client also offers the option to configure for what amount of time those versions can be stored in the file archive before they are deleted.
The following options are offered:
- 1 day
- 1 week
- 1 month
- 1 year
- forever (Default)
Example: If you chose the setting 1 week, then each file version will be stored for one week in its respective file archive before it is deleted once the set period is over. They will be removed shorty after midnight (meaning at the start of the 8th day) and regardless of how many file versions are stored in the file archive.
4. Click on OK.
5. Done! The file archive values you have configured just now will be applied for each folder from now on.
2.2 To purge the file archive contents of all toplevel folders
1. Click on Preferences on the main window.
2. Open the tab General.
3. Click on the button Cleanup located below the History drop-down menu.
4. Confirm your choice by clicking on Purge.
4. Done! The file archives of all toplevel folders are now purged and all saved versions are deleted.