Accessing folders via WebDAV on Windows
WebDAV means Web-based Distributed Authoring and Versioning. It is a set of extensions to the HTTP protocol which allows users to collaboratively edit and manage files on remote web servers (meaning by remote access to the content of the web server). It was defined in rfc4918 and evolved to a de facto standard.
Files (or folders) stored in the cloud can be accessed via WebDAV. Many operating systems come with built-in WebDAV support and allow to upload, access and explore files stored in the FAUbox without the client or any additional software installed. On faubox.rrze.fau.de all WebDAV traffic will be SSL-encrypted.
I. Access to the WebDAV URL
In order to get access to your FAUbox folders via WebDAV, you need a WebDAV URL. The WebDAV-URL could be either:
1. https://faubox.rrze.uni-erlangen.de/webdav/
or
2. https://faubox.rrze.uni.erlangen.de/webdav/foldername
If you want to access all of the FAUbox folders, you have to use the first URL, while the second one is useful in case you only want to get access to a single top level folder. In order to get access to the content of a single top level folder, you have to add the foldername to the first URL. Example: If the top level folder is called Apple, the URL would be: https://faubox.rrze.uni-erlangen.de/webdav/Apple
The address can be used in any WebDAV client to access the contents of a folder stored in the FAUbox.
![]()
You can only access folders created and owned by yourself or folders which you are a member of.
II. Instructions for internal users (employees and students of affiliated institutions; SSO or Single Sign-On-users)
The instruction for guests is located further below in the section called “III. Instructions for external users/guests”
To access folders via WebDAV, you will need an authentication token, aside from the WebDAV URL, which will authenticate you as the rightful user and your username which is shown in the FAUbox web client.
1. To get to the authentication token:
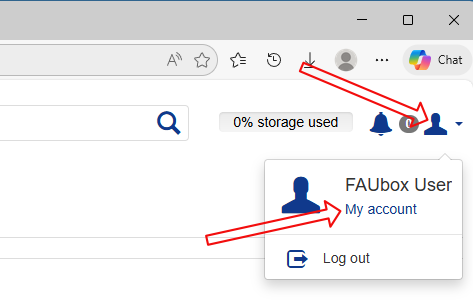
1. Open the web client and log in (https://faubox.rrze.uni-erlangen.de).
2. Choose “My Account” located at the uppder right side.
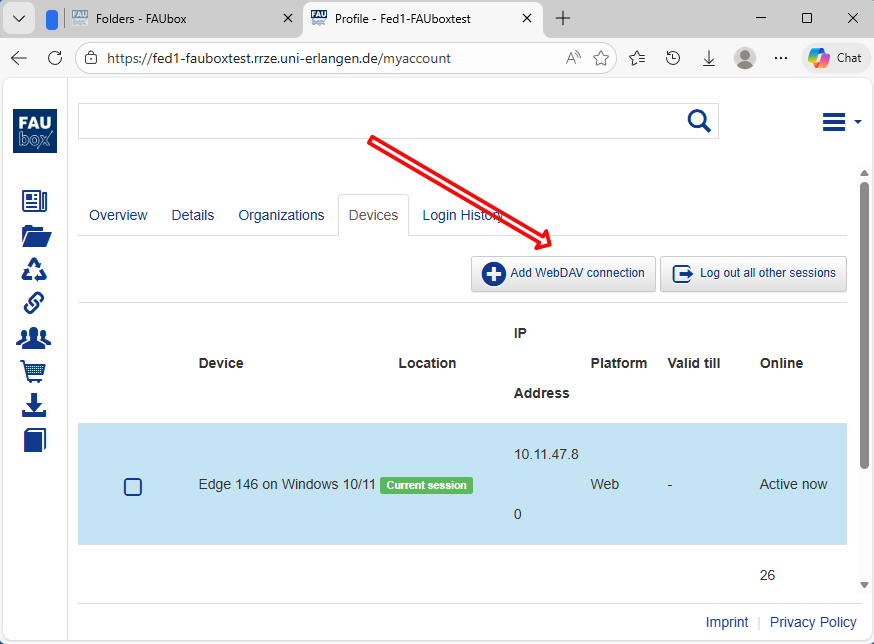
3. Choose “Devices”

4. Choose “Add WebDAV connection”
5. Choose “Generate”
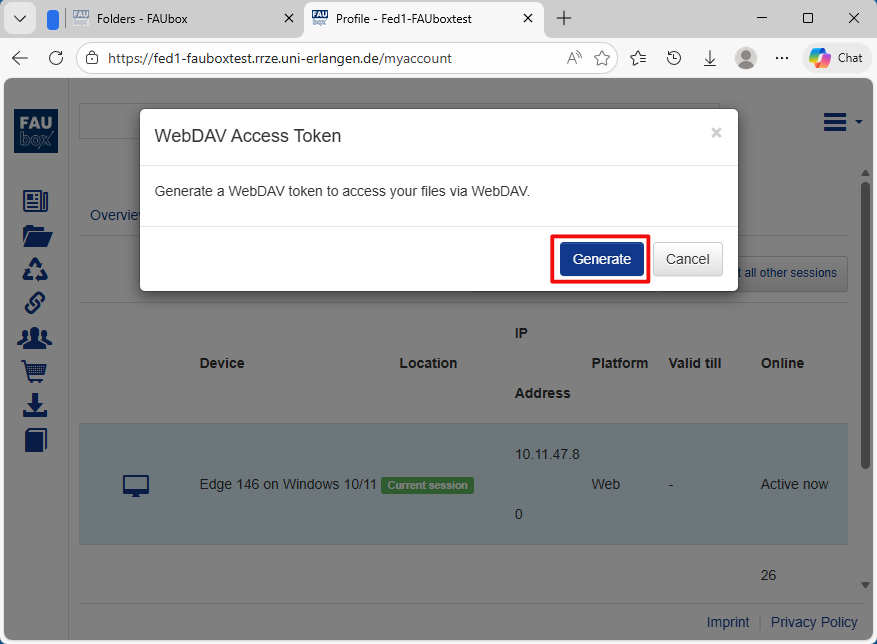
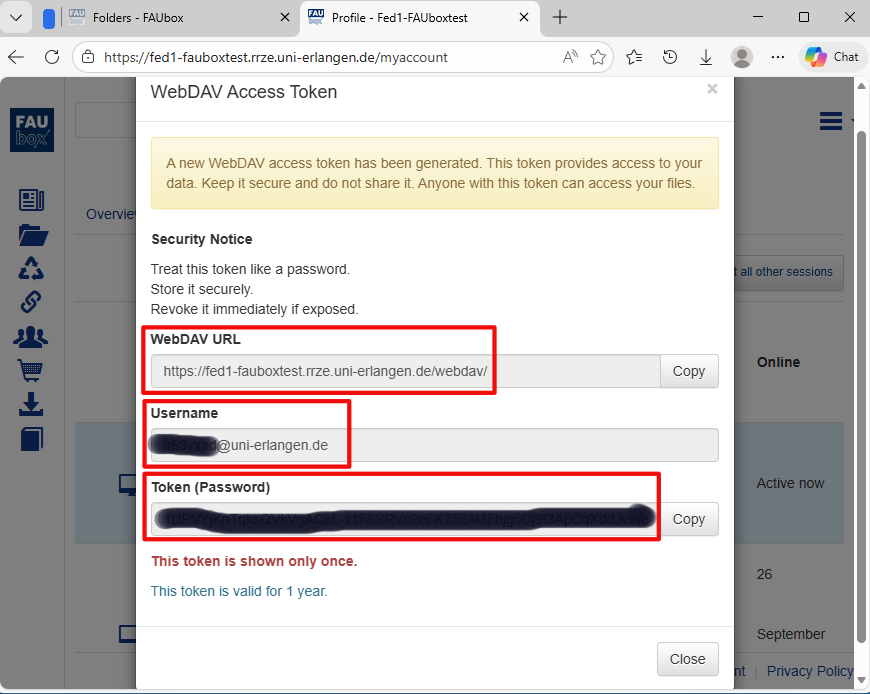
Now You can see the WebDAV URL, the FAUbox username and the WebDAV token needed for authentication to the WebDAV service. Don’t worry abouot the sometimes strange look of the username. This is delivered by your SSO identity provider.
![]()
Please note! Each authentication token has an expiration date and has to be renewed afterwards. The renew procedure is the same like described above. Just create a new one and delete the old one.
2. To set up a WebDAV connection:
1. Open the Windows Explorer.
2. Right-click Computer in the left navigation pane.
3. Click on Map network drive.
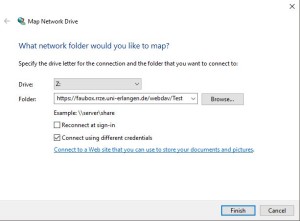
4. Select a free drive letter under the Drive drop-down.
5. Enter the WebDAV URL of the folder into the Folder field.
6. Check the Connect using different credentials checkbox.
7. Click on Finish.
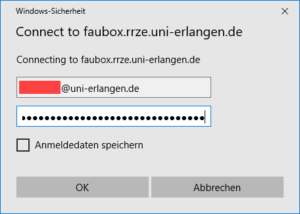
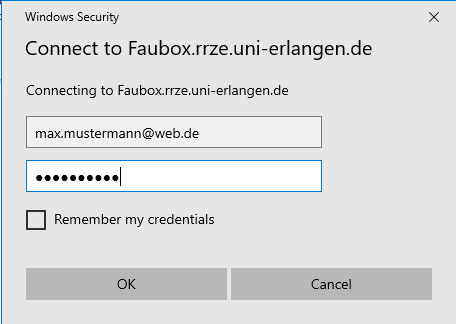
8. Connect using the access information described above (<IdM-username>@uni-erlangen.de + authentication token).
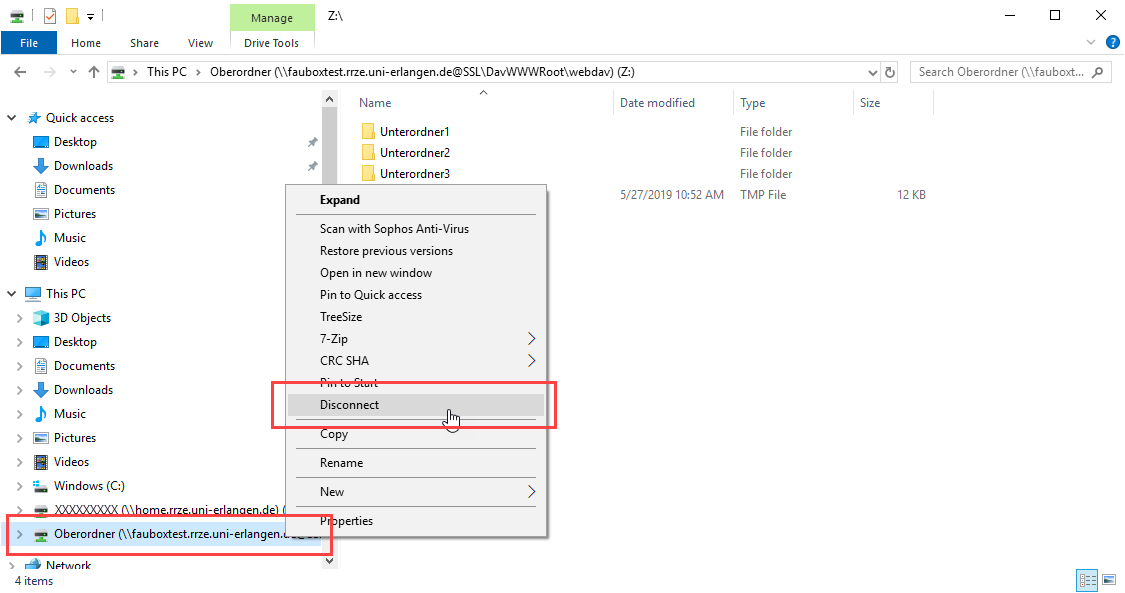
3. To disconnect the WebDAV connection:
If you want to disconnect the network drive:
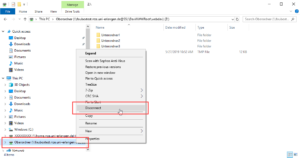
- Open the Explorer.
- Right-click on the network drive in the left-navigation pane.
- Select Disconnect.
- Save and close any affected files that you have opened using the connection (if you have not already done so).
- Done! The connection to the network drive is now disconnected.
II. Instructions for external users/guests
External users/guests have to follow the same instruction as internal users but instead of using an authentication token, they need to set up the connection using their FAUbox username and password.
1. Open the Windows Explorer.
2. Right-click Computer in the left navigation pane.
3. Click on Map network drive.
4. Select a free drive letter under the Drive drop-down.
5. Enter the WebDAV URL of the folder into the Folder field.
6. Check the Connect using different credentials checkbox.
7. Click on Finish.
8. Connect using the your FAUbox username (the e-mail address you were invited to the FAUbox with) and password to authenticate yourself.
IV. Setting up a WebDAV connection via command line:
1. Open a Command Prompt window (or start cmd.exe).
2. Use the following net use command to mount your folder to a drive letter of your choice.
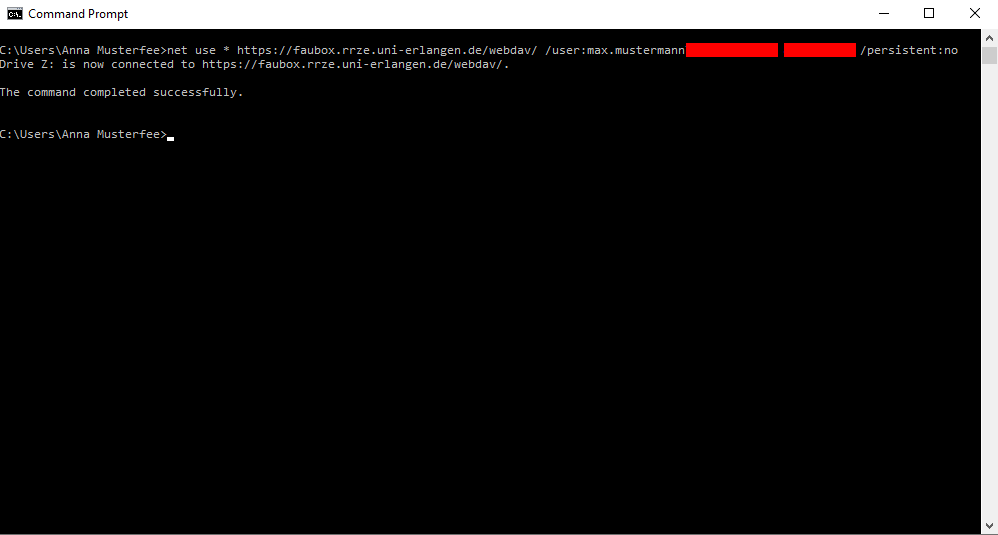
net use * https://faubox.rrze.uni-erlangen.de/webdav/ExampleFolder /user:username password /persistent:yes |
2.1 Replace https://faubox.rrze.uni-erlangen.de/webdav/ExampleFolder with the WebDAV URL for the folder you want to mount. Example:
net use * https://faubox.rrze.uni-erlangen.de/webdav/Apple /user: username password / persistent: yes
2.2 To access not only to one folder but the whole content of your FAUbox, leave an empty line between webdav/ and /user: instead of a folder name. Example:
net use * https://faubox.rrze.uni-erlangen.de/webdav/ /user:username password /persistent:yes
![]()
Always replace the words username and password with the your access data when typing in the command.
![]()
persistent:yes means that the connection to the network drive will be restored every time you switch on your computer while persistent:no means that the connection will be disconnected once you shut down your computer.