Moving the Folder Basepath of the FAUbox Client on Windows

Please note!
Moving the basic folder
path to a network drive, a usb stick or a extern disk is not recommended! There is a risk of data loss!
Before you start you should keep some things in mind.
- A change of the folders base path in the FAUbox client settings will affect new folder, only. Existing folders will not touched.
- The offered workflow for movement of existing folder will only work on very small folders in case of no synchronization will happen while the move is ongoing -> This workflow can not be recommended!
- If you delete the config file (PowerFolder.config) the folders base path will be reset to the default (C:\Users\<username>\FAUbox).
- The best plan is to copy all data first, then change the foder base path in the local FAUbox client, then stop the local FAUbox client, delete the folders database, restart the local FAUbox client, wait until everything is synchronized and finally delete all data in the old path. While doing that no synchronization should occur. Check that all synchronization is complete before you start.
- Best is to do it together with the FAUbox support.
- Copy all data from the old FAUbox base path to the new location. This location has to be local, no network drive, no usb stick, no extern disk. You risk data loss otherwise.
- Start the FAUbox client if it is not running.
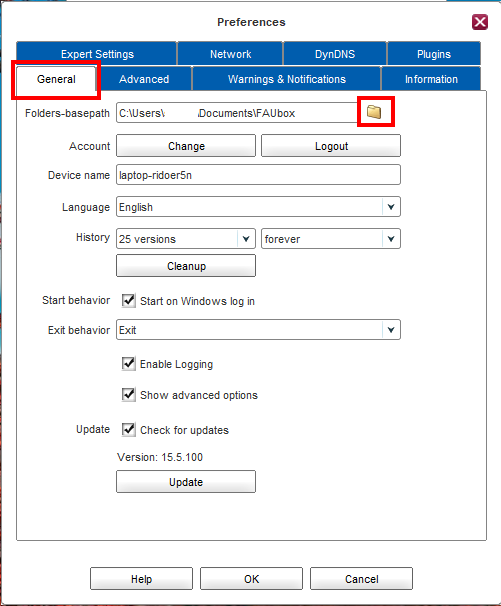
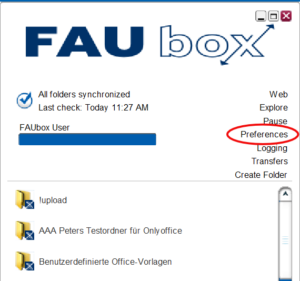
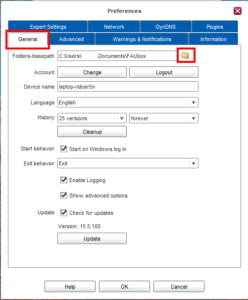
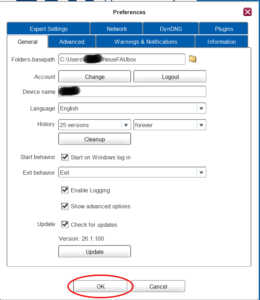
- Click on Preferences in the upper right corner and select General.
- Click on the folder icon next to folders basepath.
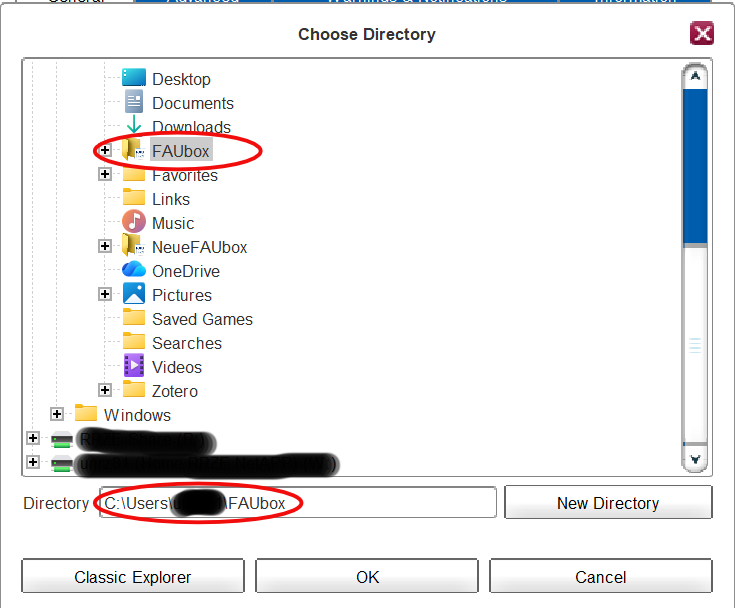
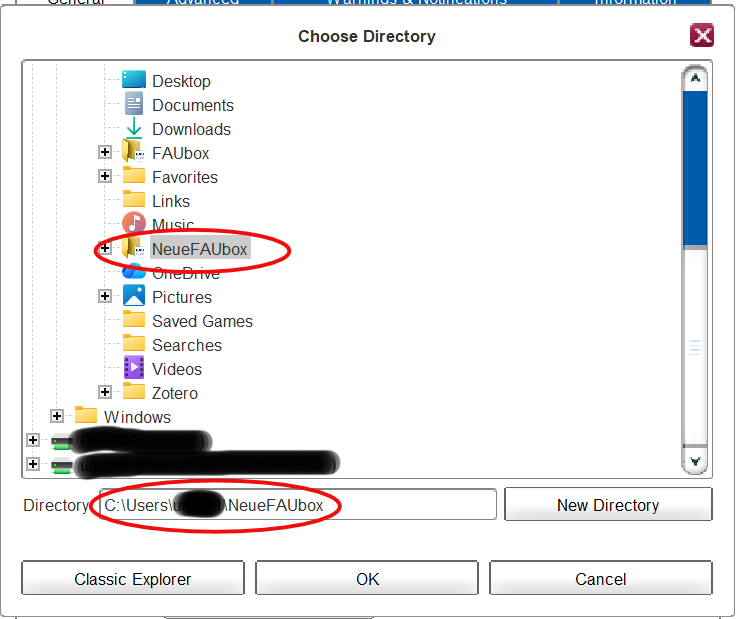
- A new window opens. Select the desired directory for the new FAUbox base path and confirm with OK.
- Old path:

- New path:

Example:
As seen in the picture above, the FAUbox base folder is located in the directory FAUbox. Now if you want to change the base path of the FAUbox and move it to NeueFAUbox for example, you have to change the path from C:\Users\___\FAUBox\ to C:\Users\___\NeueFAUbox\
Be careful to include the FAUbox basefolder in the path since it could lead to loss of data! - Old path:
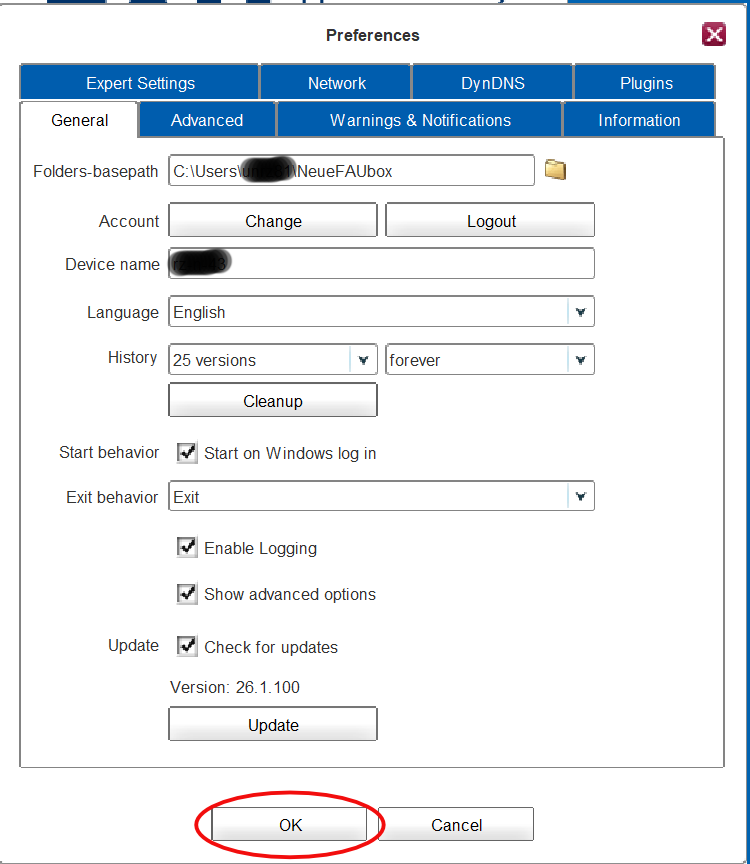
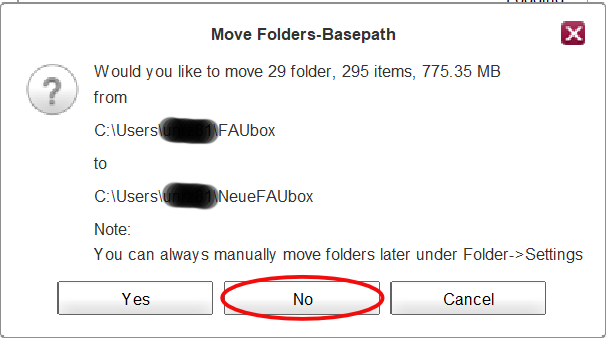
- Respond to the question to move the folders with “NO”.

- Stop the local FAUbox client. Click “Exit” at the exit behavior window.

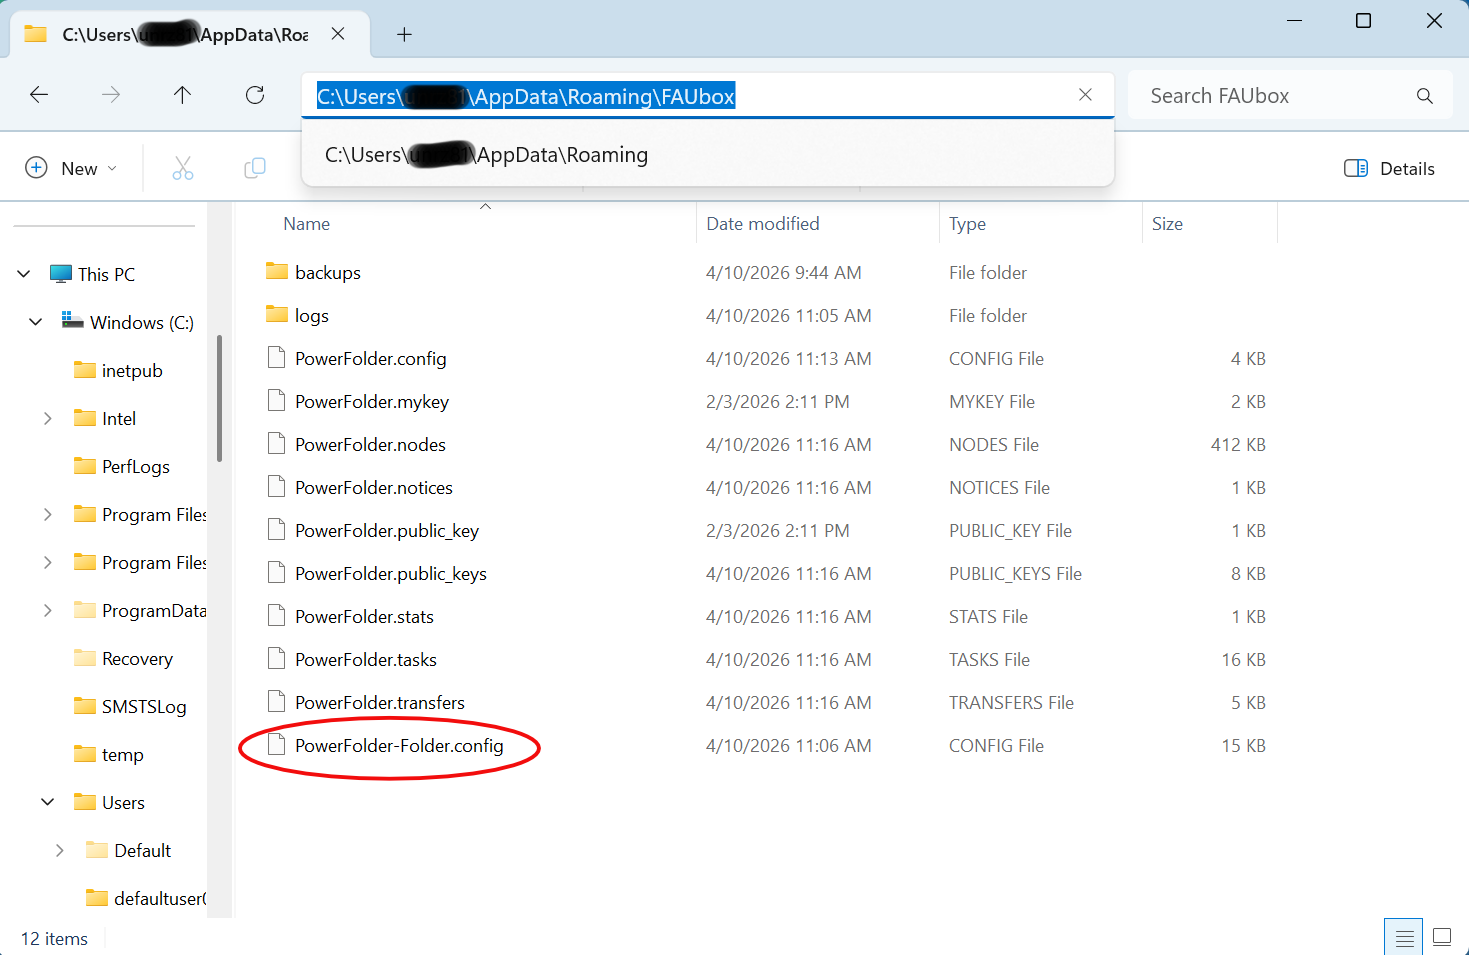
- Delete the file “%Appdata%\FAUbox\PowerFolder-Folder.config”.

- Start the local FAUbox client again.
- Wait until everything is synced.
- Done! The folder basepath of your FAUbox basefolder (including all its containing folders and files) was successfully changed. Please check all data at the new location and the folders path (see 4.) before you delete the data at the old location.