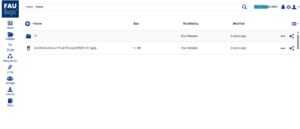
To view the content of a folder, click on the folder name in the folder list. This will immediately give you a list of the folder and it’s sub directories.
The following table shows all important icons seen in the picture above and their definition.
| Sign |
Definition |
 |
By clicking on this sign, the options Create Directory, Create Document, Create Spreadsheet, Create Presentation and Upload File will appear.
 If you want to create a directory, click on Create Directory, enter a name for the directory you are creating and click on OK. If you want to create a directory, click on Create Directory, enter a name for the directory you are creating and click on OK.
If you want to create a document, a spreadsheet or a presentation, click on the respective option, enter a name and click on OK. Afterwards, the respective programme will be opened and you can start writing. |
 |
Shows the different viewing options you have (List View, Grid View, Gallery View) |
 |
By clicking on this sign, you create a link which you can then send to other users in order to give them access to the chosen document.
After creating the link, you can choose the permission for the person who is getting access to the data by clicking on the link. You can do that by clicking on the menu right above the link and choosing between Can read and Can upload.
Furthermore, by clicking on Settings in the same menu as above, you can choose an expiry date for the link, the number of downloads you are allowing and a password to further secure the data.
By clicking on Remove the link will be deleted and can not be used anymore to get access to the data, |
 |
Symbolizes that the date is not chosen. |
 |
Symbolizes that the data is chosen and makes the options Download, Rename, Copy, Cut, Restore, Delete and Manage appear. |
 |
Displays the options Download. Rename, Copy, Cut, Restore and Delete, which can be performed on the respective folder. |
